


How To Use An Ultrasonic Cleaner
Step 1: Understand what you are trying to accomplish
If it is your first time using an ultrasonic cleaner, take into consideration what you would like for it to do.
- If you are trying to remove dirt from jewelry, a cleaner such as dish soap may be appropriate .
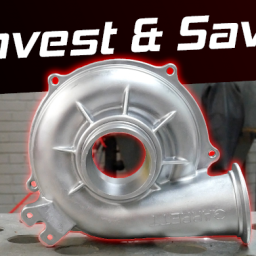
- For parts with grease and contaminants, we offer a proprietary water based cleaning solution that will get the job done.
- If you are attempting to clean incredibly dirty parts, pre-cleaning them a bit may be beneficial, but our solution will still get the job done.
- Lastly, it should be known that you can use normal tap water in your ultrasonic cleaner if you wish. Distilled water will provide the same results as tap water, but deionised water may prevent streaking.
Once you have determined what category your parts fall into, and selected a cleaner, it’s time to get cleaning.
Step 2: Set up your machine
Digital ultrasonic cleaners are typically plug and play machines.
To set up one of our machines, simply:
- Plug the power cord in
- Remove the parts basket
- Add your solution (which we will investigate further later)
- Turn the machine on
- Pre-Heat your machine if your model allows or if your parts require it
- Place your parts into the basket and carefully lower it into the machine. Always use the basket to elevate parts off of the tank bottom, as the pressure the parts will add can harm the transducers.
- To remove bubbles from your cleaning solution, you can run a degas cycle
- On some models, the temperature can only be adjusted while the unit is running, so if you would like heat, set the temperature it should reach now
- Set your cleaning time (if you are uncertain of how long to specify, running a shorter cycle first and assessing can help you gauge the time needed for your part)
- Choose between the full-wave (hard) and the semi-wave (soft) cleaning mode
- Once you press either of the options above, your machine should buzz to life
Advantages
There are two ways you can administer your selected cleaning solution. You can either pour your solution directly into the tank, or put it into specific jars with specific parts. The advantage of using the entire tank for one solution is that multiple parts can be processed at once. A major downside of this method is that the entire tank is contaminated after one use. The second option is to place your parts and solution into sealed glass containers, then place them into your fully water filled ultrasonic tank. This method saves you from contaminating your entire tank and allows you to clean parts with different solutions at the same time. A smaller number of parts can be processed while using this method.
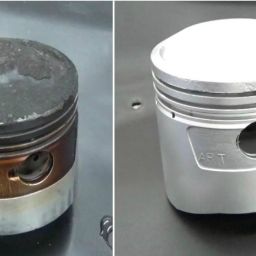
The advantages of digital ultrasonic cleaning begin with how it works. Acting on the surface at a microscopic level ensures that every bit of a part is cleaned. It also guarantees your parts internals will be cleaned as well. Being a hands free method of cleaning is another plus for ultrasonic tanks, and the fact that they are non-abrasive seals the deal.
If you would like to add all of these advantages to your workflow, you can purchase an ultrasonic cleaner today.
NOTE: Never put any part of your body in the ultrasonic cleaner while it is running. This can cause skin irritation and damage to your joints. Please make sure to read all of your user manual before operating the ultrasonic cleaner. We are not liable for any harm that occurs to you or your machine.